
GitHub-workflow
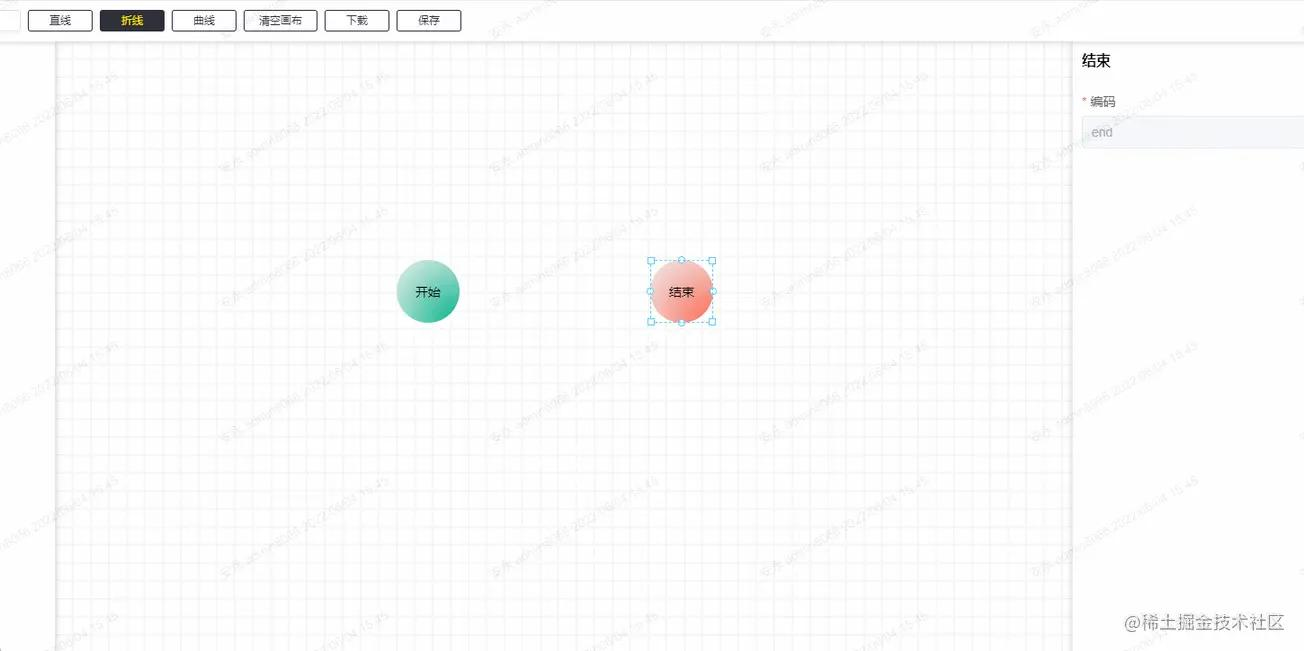
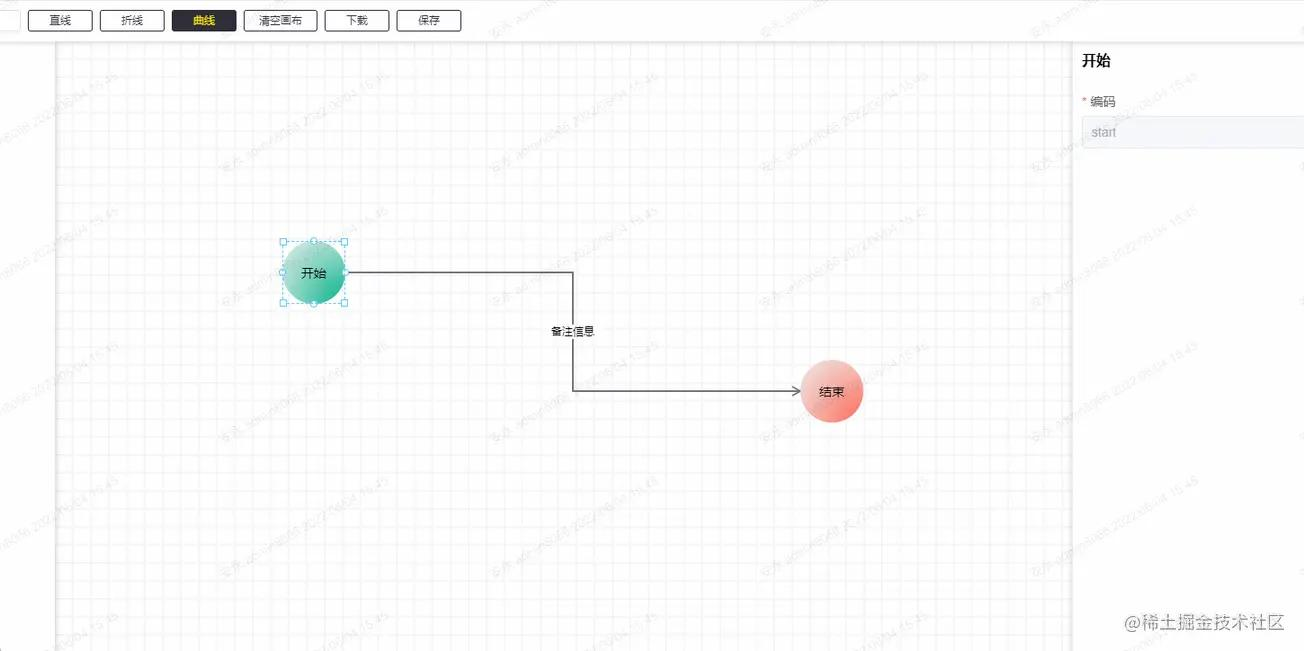
這里主要是針對于工作流場景的流程圖繪制及實現方式。下面是效果圖:
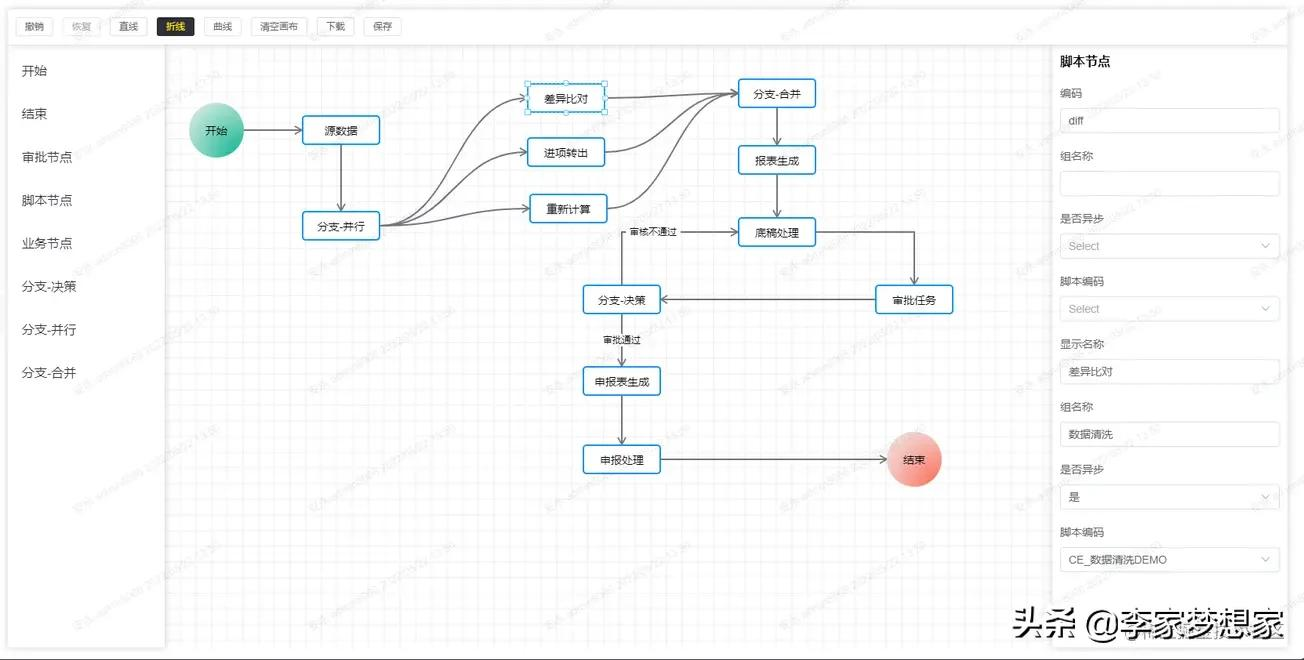
整體結構布局:
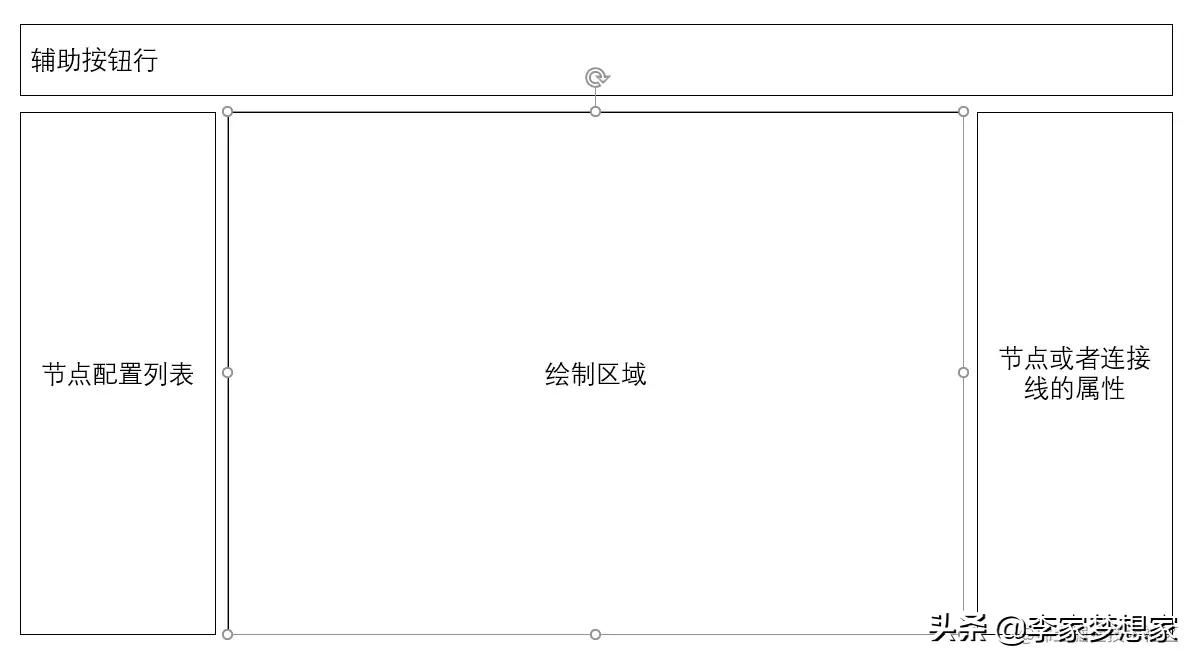
需要實現的功能列表:
- 節點與連接線的可配置
- 節點的拖拽與渲染及連接線的繪制
- 節點與連接線的選擇
- 節點的樣式調整
- 節點移動時的吸附
- 撤銷和恢復
節點與連接線的可配置
- 節點配置信息
[
  {
    'id': '', // 每次渲染會生成一個新的id
    'name': 'start', // 節點名稱,也就是類型
    'label': '開始', // 左側列表節點的名稱
    'displayName': '開始', // 渲染節點的顯示名稱(可修改)
    'className': 'icon-circle start', // 節點在渲染時候的class,可用于自定義節點的樣式
    'attr': { // 節點的屬性
      'x': 0, // 節點相對于畫布的 x 位置
      'y': 0, // 節點相對于畫布的 y 位置
      'w': 70, // 節點的初始寬度
      'h': 70  // 節點的初始高度
    },
    'next': [], // 節點出度的線
    'props': [] // 節點可配置的業務屬性
  },
  // ...
]
復制代碼
- 連接線配置信息
// next
[
  {
    // 連接線的id
    'id': 'ee1c5fa3-f822-40f1-98a1-f76db6a2362b',
    // 連接線的結束節點id
    'targetComponentId': 'fa7fbbfa-fc43-4ac8-8911-451d0098d0cb',
    // 連接線在起始節點的方向
    'directionStart': 'right',
    // 連接線在結束節點的方向
    'directionEnd': 'left',
    // 線的類型(直線、折線、曲線)
    'lineType': 'straight',
    // 顯示在連接線中點的標識信息
    'extra': '',
    // 連接線在起始節點的id
    'componentId': 'fde2a040-3795-4443-a57b-af412d06c023'
  },
  // ...
]
復制代碼
- 節點的屬性配置結構
// props
[
  {
    // 表單的字段
    name: 'displayName',
    // 表單的標簽
    label: '顯示名稱',
    // 字段的值
    value: '旅客運輸',
    // 編輯的類型
    type: 'input',
    // 屬性的必填字段
    required: true,
    // 表單組件的其它屬性
    props: {
        placeholder: 'xxx'
    }
  },
  // ...
]
復制代碼
對于下拉選擇的數據,如果下拉的數據非常多,那么配置保存的數據量也會很大,所以可以把所有的下拉數據統一管理,在獲取左側的配置節點的信息時,將所有的下拉數據提取出來,以 props 的 name 值為 key 保存起來,在用的時候用 props.name 來取對應的下拉數據。
另外還需要配置連接線的屬性,相對于節點的屬性,每一個節點的屬性都有可能不一樣,但是連接線在沒有節點的時候是沒有的,所以我們要先準備好連接線的屬性,在連接線生成的時候,在加到連接線的屬性里去。當然我們可以把連接線的屬性設置為一樣的,也可以根據節點的不同來設置不同連接線的屬性。
最后使用的方式:
<template>
  <workflow
    ref="workflowRef"
    @component-change="getActiveComponent"
    @line-change="getActiveLine"
    main-height="calc(100vh - 160px)">
  </workflow>
</template>


<script lang="ts" setup>
import { ref } from 'vue'
import Workflow from '@/components/workflow'
import { commonRequest } from '@/utils/common'
import { ElMessage, ElMessageBox } from 'element-plus'
import { useRoute } from 'vue-router'

const route = useRoute()

const processId = route.query.processId // || 'testca08c433c34046e4bb2a8d3ce3ebc'
const processType = route.query.processType

// 切換的當前節點
const getActiveComponent = (component: Record<string, any>) => {
  console.log('active component', component)
}

// 切換的當前連接線
const getActiveLine = (line: Record<string, any>) => {
  console.log('active line', line)
}

const workflowRef = ref<InstanceType<typeof Workflow>>()

// 獲取配置的節點列表
const getConfig = () => {
  commonRequest(`/workflow/getWorkflowConfig?processType=${processType}`).then((res: Record<string, any>) => {
    // 需要把所有的屬性根據name轉換成 key - value 形式
    const props: Record<string, any> = {}
    transferOptions(res.result.nodes, props)
    // 設置左側配置的節點數據
    workflowRef.value?.setConfig(res.result)
    getData(props)
  })
}
// 獲取之前已經配置好的數據
const getData = (props: Record<string, any>) => {
  commonRequest(`/workflow/getWfProcess/${processId}`).then((res: Record<string, any>) => {
    // 調整屬性,這里是為了當配置列表的節點或者屬性有更新,從而更新已配置的節點的屬性
    adjustProps(props, res.result.processJson)
    // 設置已配置好的數據,并渲染
    workflowRef.value?.setData(res.result.processJson, res.result.type || 'add')
  })
}

const init = () => {
  if (!processId) {
    ElMessageBox.alert('當前沒有流程id')
    return
  }
  getConfig()
}
init()

const transferOptions = (nodes: Record<string, any>[], props: Record<string, any>) => {
  nodes?.forEach((node: Record<string, any>) => {
    props[node.name] = node.props
  })
}

const adjustProps = (props: Record<string, any>, nodes: Record<string, any>[]) => {
  nodes.forEach((node: Record<string, any>) => {
    const oldProp: Record<string, any>[] = node.props
    const res = transferKV(oldProp)
    node.props = JSON.parse(JSON.stringify(props[node.name]))
    node.props.forEach((prop: Record<string, any>) => {
      prop.value = res[prop.name]
    })
  })
}

const transferKV = (props: Record<string, any>[]) => {
  const res: Record<string, any> = {}
  props.forEach((prop: Record<string, any>) => {
    res[prop.name] = prop.value
  })
  return res
}
</script>
復制代碼
節點的拖拽與渲染及連接線的繪制
關于節點的拖拽就不多說了,就是 drag 相關的用法,主要是渲染區域的節點和連接線的設計。
這里的渲染區域的思路是:以 canvas 元素作為畫布背景,節點是以 div 的方式渲染拖拽進去的節點,拖拽的位置將是以 canvas 的相對位置來移動,大概的結構如下:
<template>
    <!-- 渲染區域的祖先元素 -->
    <div>
        <!-- canvas 畫布,絕對于父級元素定位, inset: 0; -->
        <canvas></canvas>
        <!-- 節點列表渲染的父級元素,絕對于父級元素定位, inset: 0; -->
        <div>
            <!-- 節點1,絕對于父級元素定位 -->
            <div></div>
            <!-- 節點2,絕對于父級元素定位 -->
            <div></div>
            <!-- 節點3,絕對于父級元素定位 -->
            <div></div>
            <!-- 節點4,絕對于父級元素定位 -->
            <div></div>
        </div>
    </div>
</template>
復制代碼
而連接線的繪制是根據 next 字段的信息,查找到 targetComponentId 組件的位置,然后在canvas上做兩點間的 線條繪制。
鏈接的類型分為3種: 直線,折線,曲線
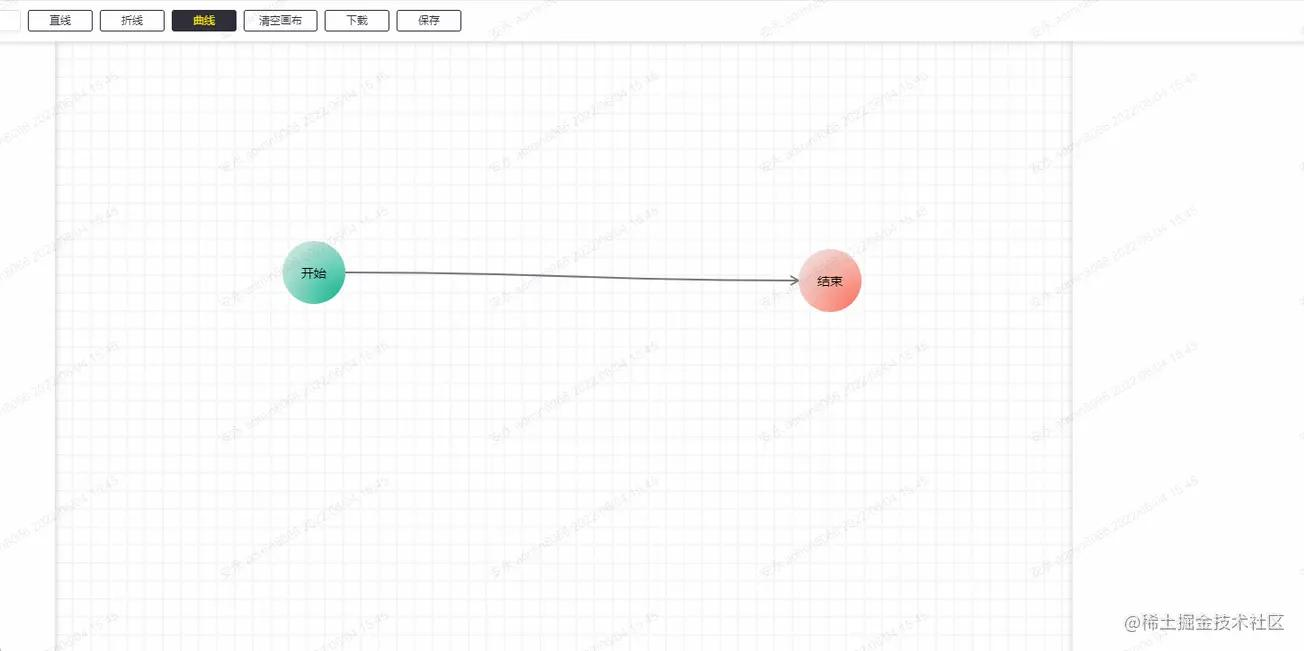
- 直線
直線的繪制最為簡單,取兩個點連接就行。
// 繪制直線
const drawStraightLine = (
  ctx: CanvasRenderingContext2D,
  points: [number, number][],
  highlight?: boolean
) => {
  ctx.beginPath()
  ctx.moveTo(points[0][0], points[0][1])
  ctx.lineTo(points[1][0], points[1][1])
  // 是否是當前選中的連接線,當前連接線高亮
  shadowLine(ctx, highlight)
  ctx.stroke()
  ctx.restore()
  ctx.closePath()
}
復制代碼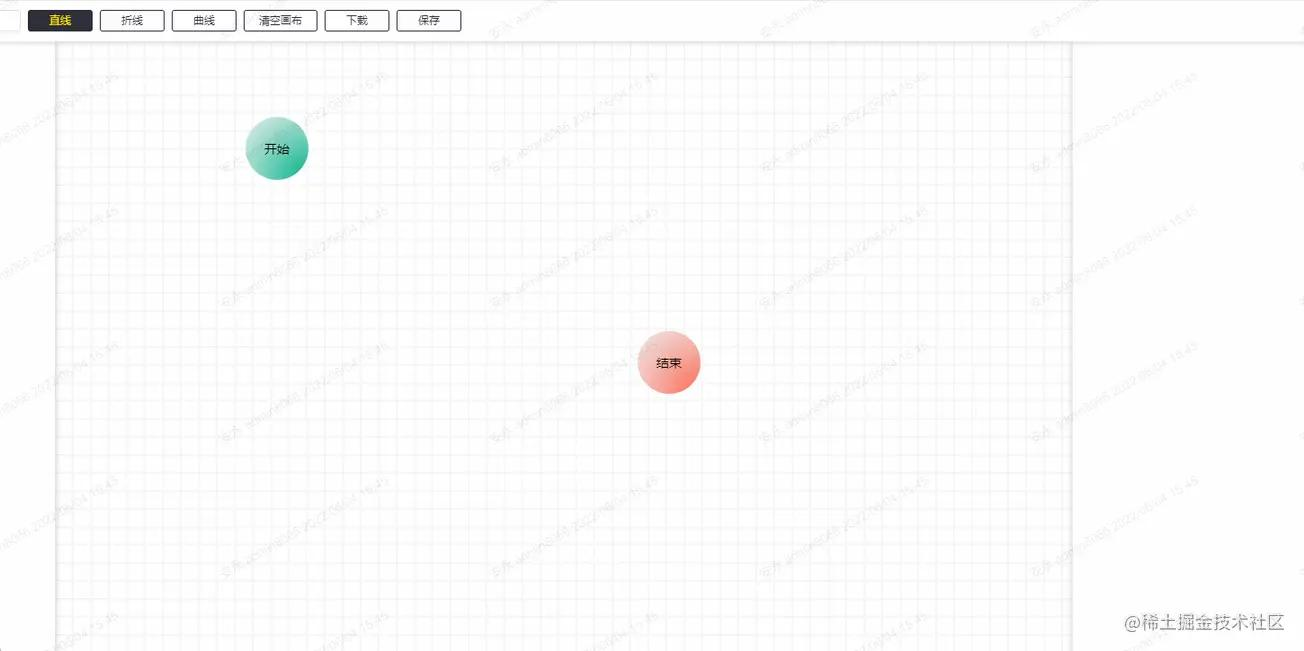
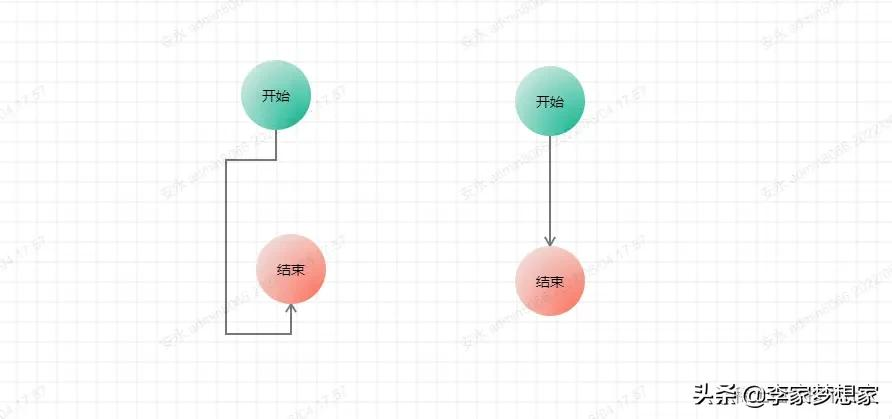
- 折線
折線的方式比較復雜,因為折線需要盡可能的不要把連接線和節點重合,所以它要判斷每一種連接線的場景,還有兩個節點的寬度和高度也需要考慮計算。如下:
起始節點有四個方向,目標節點也有四個方向,還有目標節點相對于起始節點有四個象限,所以嚴格來說,總共有 4 * 4 * 4 = 64 種場景。這些場景中的折線點也不一樣,最多的有 4 次, 最少的折 0 次,單求出這 64 種坐標點就用了 700 行代碼。
最后的繪制方法與直線一樣:
// 繪制折線
const drawBrokenLine = ({ ctx, points }: WF.DrawLineType, highlight?: boolean) => {
  ctx.beginPath()
  ctx.moveTo(points[0][0], points[0][1])
  for (let i = 1; i < points.length; i++) {
    ctx.lineTo(points[i][0], points[i][1])
  }
  shadowLine(ctx, highlight)
  ctx.stroke()
  ctx.restore()
  ctx.closePath()
}
復制代碼
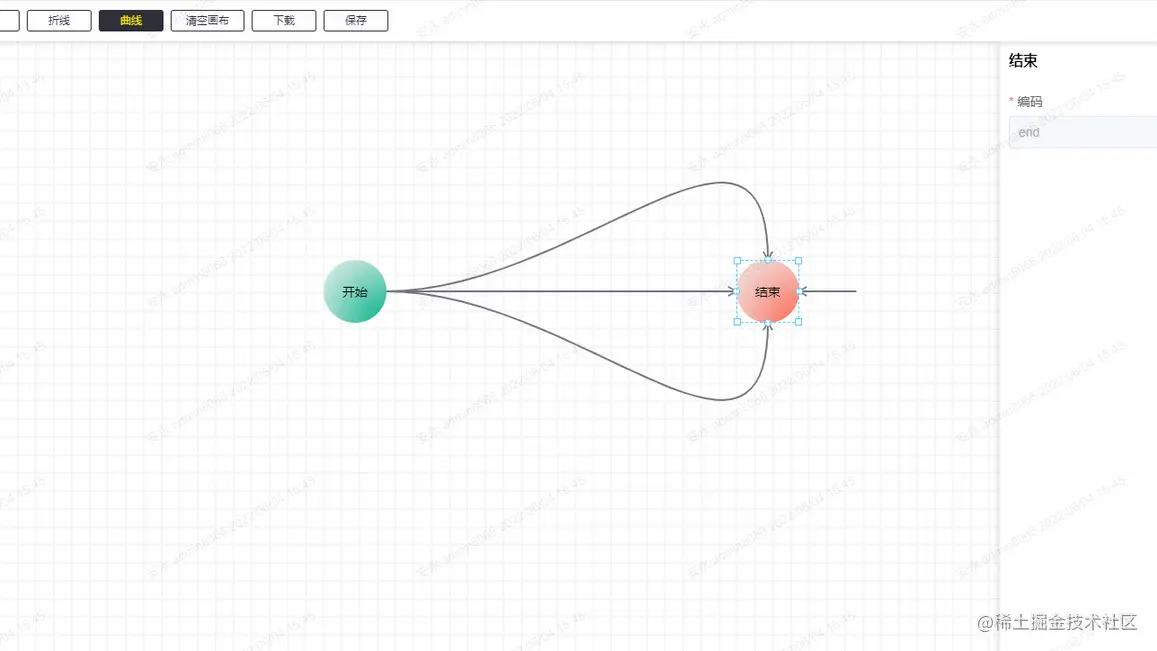
- 曲線
曲線相對于折線來說,思路會簡單很多,不需要考慮折線這么多場景。
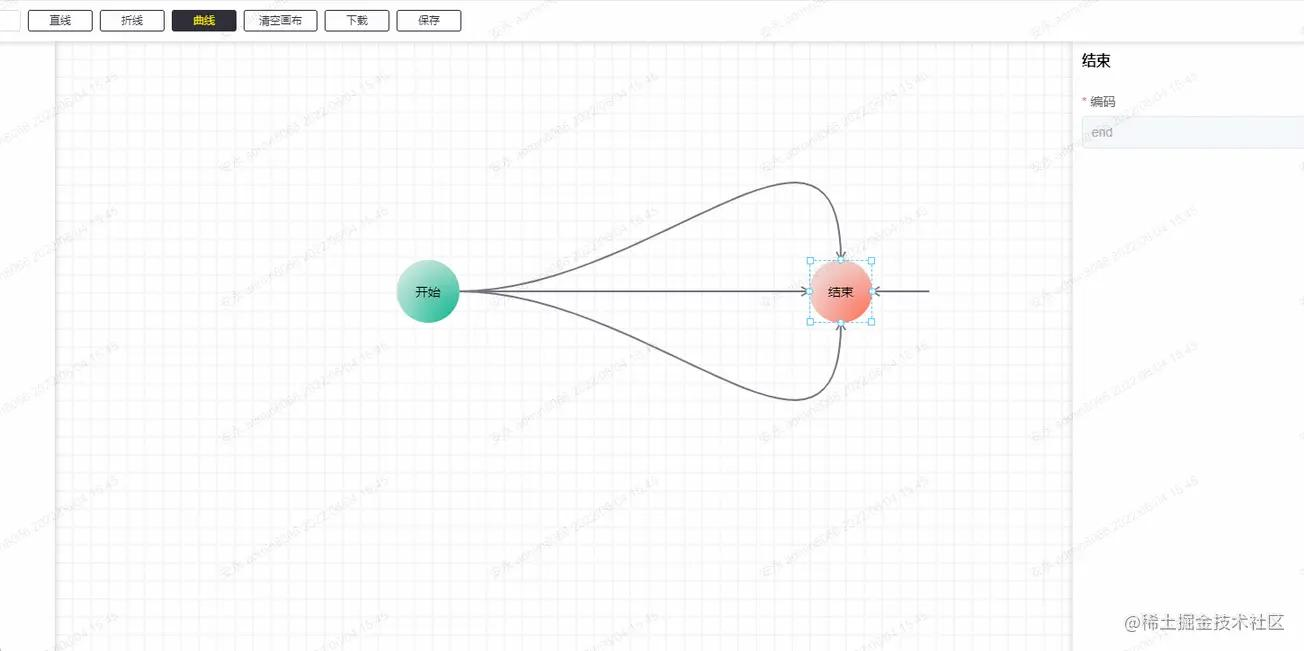
這里的折線是用三階的貝塞爾曲線來繪制的,固定的取四個點,兩個起止點,兩個控制點,其中兩個起止點是固定的,我們只需要求出兩個控制點的坐標即可。這里代碼不多,可以直接貼出來:
/**
 * Description: 計算三階貝塞爾曲線的坐標
 */
import WF from '../type'

const coeff = 0.5
export default function calcBezierPoints({ startDire, startx, starty, destDire, destx, desty }: WF.CalcBezierType,
  points: [number, number][]) {

  const p = Math.max(Math.abs(destx - startx), Math.abs(desty - starty)) * coeff
  switch (startDire) {
    case 'down':
      points.push([startx, starty + p])
      break
    case 'up':
      points.push([startx, starty - p])
      break
    case 'left':
      points.push([startx - p, starty])
      break
    case 'right':
      points.push([startx + p, starty])
      break
    // no default
  }
  switch (destDire) {
    case 'down':
      points.push([destx, desty + p])
      break
    case 'up':
      points.push([destx, desty - p])
      break
    case 'left':
      points.push([destx - p, desty])
      break
    case 'right':
      points.push([destx + p, desty])
      break
    // no default
  }
}
復制代碼
簡單一點來說,第一個控制點是根據起始點來算的,第二個控制點是跟根據結束點來算的。算的方式是根據當前點相對于節點的方向,繼續往前算一段距離,而這段距離是根據起止兩個點的最大相對距離的一半(可能有點繞...)。
繪制方法:
// 繪制貝塞爾曲線
const drawBezier = ({ ctx, points }: WF.DrawLineType, highlight?: boolean) => {
  ctx.beginPath()
  ctx.moveTo(points[0][0], points[0][1])
  ctx.bezierCurveTo(
    points[1][0], points[1][1], points[2][0], points[2][1], points[3][0], points[3][1]
  )
  shadowLine(ctx, highlight)
  ctx.stroke()
  ctx.restore()
  ctx.globalCompositeOperation = 'source-over'    //目標圖像上顯示源圖像
}
復制代碼
節點與連接線的選擇
節點是用 div 來渲染的,所以節點的選擇可以忽略,然后就是連接點的選擇,首先第一點是鼠標在移動的時候都要判斷鼠標的當前位置下面是否有連接線,所以這里就有 3 種判斷方法,呃... 嚴格來說是兩種,因為折線是多條直線,所以是按直線的判斷方法來。
// 判斷當前鼠標位置是否有線
export const isAboveLine = (offsetX: number, offsetY: number, points: WF.LineInfo[]) => {
  for (let i = points.length - 1; i >= 0; --i) {
    const innerPonints = points[i].points
    let pre: [number, number], cur: [number, number]
    // 非曲線判斷方法
    if (points[i].type !== 'bezier') {
      for (let j = 1; j < innerPonints.length; j++) {
        pre = innerPonints[j - 1]
        cur = innerPonints[j]
        if (getDistance([offsetX, offsetY], pre, cur) < 20) {
          return points[i]
        }
      }
    } else {
      // 先用 x 求出對應的 t,用 t 求相應位置的 y,再比較得出的 y 與 offsetY 之間的差值
      const tsx = getBezierT(innerPonints[0][0], innerPonints[1][0], innerPonints[2][0], innerPonints[3][0], offsetX)
      for (let x = 0; x < 3; x++) {
        if (tsx[x] <= 1 && tsx[x] >= 0) {
          const ny = getThreeBezierPoint(tsx[x], innerPonints[0], innerPonints[1], innerPonints[2], innerPonints[3])
          if (Math.abs(ny[1] - offsetY) < 8) {
            return points[i]
          }
        }
      }
      // 如果上述沒有結果,則用 y 求出對應的 t,再用 t 求出對應的 x,與 offsetX 進行匹配
      const tsy = getBezierT(innerPonints[0][1], innerPonints[1][1], innerPonints[2][1], innerPonints[3][1], offsetY)
      for (let y = 0; y < 3; y++) {
        if (tsy[y] <= 1 && tsy[y] >= 0) {
          const nx = getThreeBezierPoint(tsy[y], innerPonints[0], innerPonints[1], innerPonints[2], innerPonints[3])
          if (Math.abs(nx[0] - offsetX) < 8) {
            return points[i]
          }
        }
      }
    }
  }

  return false
}
復制代碼
直線的判斷方法是點到線段的距離:
/**
 * 求點到線段的距離
 * @param {number} pt 直線外的點
 * @param {number} p 直線內的點1
 * @param {number} q 直線內的點2
 * @returns {number} 距離
 */
function getDistance(pt: [number, number], p: [number, number], q: [number, number]) {
  const pqx = q[0] - p[0]
  const pqy = q[1] - p[1]
  let dx = pt[0] - p[0]
  let dy = pt[1] - p[1]
  const d = pqx * pqx + pqy * pqy   // qp線段長度的平方
  let t = pqx * dx + pqy * dy     // p pt向量 點積 pq 向量(p相當于A點,q相當于B點,pt相當于P點)
  if (d > 0) {  // 除數不能為0; 如果為零 t應該也為零。下面計算結果仍然成立。
    t /= d      // 此時t 相當于 上述推導中的 r。
  }
  if (t < 0) {  // 當t(r)< 0時,最短距離即為 pt點 和 p點(A點和P點)之間的距離。
    t = 0
  } else if (t > 1) { // 當t(r)> 1時,最短距離即為 pt點 和 q點(B點和P點)之間的距離。
    t = 1
  }

  // t = 0,計算 pt點 和 p點的距離; t = 1, 計算 pt點 和 q點 的距離; 否則計算 pt點 和 投影點 的距離。
  dx = p[0] + t * pqx - pt[0]
  dy = p[1] + t * pqy - pt[1]

  return dx * dx + dy * dy
}
復制代碼
關于曲線的判斷方法比較復雜,這里就不多介紹, 想了解的可以去看這篇: 如何判斷一個坐標點是否在三階貝塞爾曲線附近
連接線還有一個功能就是雙擊連接線后可以編輯這條連接線的備注信息。這個備注信息的位置是在當前連接線的中心點位置。所以我們需要求出中心點,這個相對簡單。
// 獲取一條直線的中點坐標
const getStraightLineCenterPoint = ([[x1, y1], [x2, y2]]: [number, number][]): [number, number] => {
  return [(x1 + x2) / 2, (y1 + y2) / 2]
}

// 獲取一條折線的中點坐標
const getBrokenCenterPoint = (points: [number, number][]): [number, number] => {
  const lineDistancehalf = getLineDistance(points) >> 1

  let distanceSum = 0, pre = 0, tp: [number, number][] = [], distance = 0

  for (let i = 1; i < points.length; i++) {
    pre = getTwoPointDistance(points[i - 1], points[i])
    if (distanceSum + pre > lineDistancehalf) {
      tp = [points[i - 1], points[i]]
      distance = lineDistancehalf - distanceSum
      break
    }
    distanceSum += pre
  }

  if (!tp.length) {
    return [0, 0]
  }

  let x = tp[0][0], y = tp[0][1]

  if (tp[0][0] === tp[1][0]) {
    if (tp[0][1] > tp[1][1]) {
      y -= distance
    } else {
      y += distance
    }
  } else {
    if (tp[0][0] > tp[1][0]) {
      x -= distance
    } else {
      x += distance
    }
  }

  return [x, y]
}
復制代碼
曲線的中心點位置,可以直接拿三階貝塞爾曲線公式求出
// 獲取三階貝塞爾曲線的中點坐標
const getBezierCenterPoint = (points: [number, number][]) => {
  return getThreeBezierPoint(
    0.5, points[0], points[1], points[2], points[3]
  )
}

/**
 * @desc 獲取三階貝塞爾曲線的線上坐標
 * @param {number} t 當前百分比
 * @param {Array} p1 起點坐標
 * @param {Array} p2 終點坐標
 * @param {Array} cp1 控制點1
 * @param {Array} cp2 控制點2
 */
export const getThreeBezierPoint = (
  t: number,
  p1: [number, number],
  cp1: [number, number],
  cp2: [number, number],
  p2: [number, number]
): [number, number] => {
  const [x1, y1] = p1
  const [x2, y2] = p2
  const [cx1, cy1] = cp1
  const [cx2, cy2] = cp2
  const x =
    x1 * (1 - t) * (1 - t) * (1 - t) +
    3 * cx1 * t * (1 - t) * (1 - t) +
    3 * cx2 * t * t * (1 - t) +
    x2 * t * t * t
  const y =
    y1 * (1 - t) * (1 - t) * (1 - t) +
    3 * cy1 * t * (1 - t) * (1 - t) +
    3 * cy2 * t * t * (1 - t) +
    y2 * t * t * t
  return [x | 0, y | 0]
}
復制代碼
在算出每一條的中心點位置后,在目標位置添加備注信息即可:
節點的樣式調整
節點的樣式調整主要是位置及大小,而這些屬性就是節點里面的 attr,在相應的事件下根據鼠標移動的方向及位置,來調整節點的樣式。
還有批量操作也是同樣,不過批量操作是要先計算出哪些節點的范圍。
// 獲取范圍選中內的組件
export const getSelectedComponent = (componentList: WF.ComponentType[], areaPosi: WF.Attr) => {
  let selectedArea: WF.Attr | null = null
  let minx = Infinity, miny = Infinity, maxx = -Infinity, maxy = -Infinity
  const selectedComponents = componentList.filter((component: WF.ComponentType) => {

    const res = areaPosi.x <= component.attr.x &&
      areaPosi.y <= component.attr.y &&
      areaPosi.x + areaPosi.w >= component.attr.x + component.attr.w &&
      areaPosi.y + areaPosi.h >= component.attr.y + component.attr.h

    if (res) {
      minx = Math.min(minx, component.attr.x)
      miny = Math.min(miny, component.attr.y)
      maxx = Math.max(maxx, component.attr.x + component.attr.w)
      maxy = Math.max(maxy, component.attr.y + component.attr.h)
    }
    return res
  })

  if (selectedComponents.length) {
    selectedArea = {
      x: minx,
      y: miny,
      w: maxx - minx,
      h: maxy - miny
    }
    return {
      selectedArea, selectedComponents
    }
  }
  return null
}
復制代碼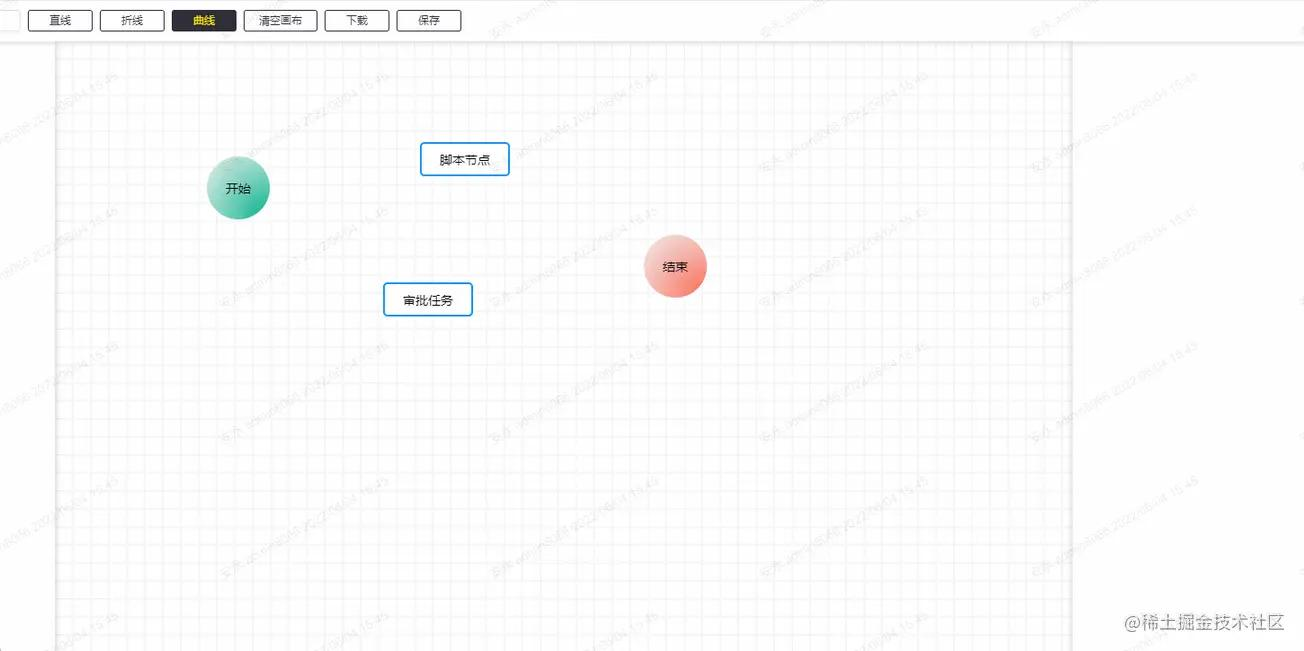
這個有個小功能沒有做,就是在批量調整大小的時候,節點間的相對距離應該是不動的,這里忽略了。
節點移動時的吸附
這里的吸附功能其實是做了一個簡單版的,就是 x 和 y 軸都只有一條校準線,且校準的優先級是從左至右,從上至下。

這里吸附的標準是節點的 6 個點:X 軸的左中右,Y 軸的上中下,當前節點在移動的時候,會用當前節點的 6 個點,一一去與其它節點的 6 個點做比較,在誤差正負 2px 的情況,自動更新為0,即自定對齊。
因為移動當前節點時候,其它的節點是不動的,所以這里是做了一步預處理,即在鼠標按下去的時候,把其它的節點的 6 個點都線算出來,用 Set 結構保存,在移動的過程的比較中,計算量會相對較少。
// 計算其它節點的所有點位置
export const clearupPostions = (componentList: WF.ComponentType[], currId: string) => {
  // x 坐標集合
  const coordx = new Set<number>()
  // y 坐標集合
  const coordy = new Set<number>()

  componentList.forEach((component: WF.ComponentType) => {
    if (component.id === currId) {
      return
    }
    const { x, y, w, h } = component.attr
    coordx.add(x)
    coordx.add(x + (w >> 1))
    coordx.add(x + w)
    coordy.add(y)
    coordy.add(y + (h >> 1))
    coordy.add(y + h)
  })

  return [coordx, coordy]
}
復制代碼
判讀是否有可吸附的點
// 可吸附范圍
const ADSORBRANGE = 2
// 查詢是否有可吸附坐標
const hasAdsorbable = (
  coords: Set<number>[], x: number, y: number, w: number, h: number
) => {
  // x, y, w, h, w/2, h/2
  const coord: (number | null)[] = [null, null, null, null, null, null]
  // 查詢 x 坐標
  for (let i = 0; i <= ADSORBRANGE; i++) {
    if (coords[0].has(x + i)) {
      coord[0] = i
      break
    }
    if (coords[0].has(x - i)) {
      coord[0] = -i
      break
    }
  }

  // 查詢 y 坐標
  for (let i = 0; i <= ADSORBRANGE; i++) {
    if (coords[1].has(y + i)) {
      coord[1] = i
      break
    }
    if (coords[1].has(y - i)) {
      coord[1] = -i
      break
    }
  }

  // 查詢 x + w 坐標
  for (let i = 0; i <= ADSORBRANGE; i++) {
    if (coords[0].has(x + w + i)) {
      coord[2] = i
      break
    }
    if (coords[0].has(x + w - i)) {
      coord[2] = -i
      break
    }
  }

  // 查詢 y + h 坐標
  for (let i = 0; i <= ADSORBRANGE; i++) {
    if (coords[1].has(y + h + i)) {
      coord[3] = i
      break
    }
    if (coords[1].has(y + h - i)) {
      coord[3] = -i
      break
    }
  }

  // 查詢 x + w/2 坐標
  for (let i = 0; i <= ADSORBRANGE; i++) {
    if (coords[0].has(x + (w >> 1) + i)) {
      coord[4] = i
      break
    }
    if (coords[0].has(x + (w >> 1) - i)) {
      coord[4] = -i
      break
    }
  }

  // 查詢 y + h/2 坐標
  for (let i = 0; i <= ADSORBRANGE; i++) {
    if (coords[1].has(y + (h >> 1) + i)) {
      coord[5] = i
      break
    }
    if (coords[1].has(y + (h >> 1) - i)) {
      coord[5] = -i
      break
    }
  }

  return coord
}
復制代碼
最后更新狀態。
// 獲取修正后的 x, y,還有吸附線的狀態
export const getAdsordXY = (
  coords: Set<number>[], x: number, y: number, w: number, h: number
) => {
  const vals = hasAdsorbable(
    coords, x, y, w, h
  )

  let linex = null
  let liney = null

  if (vals[0] !== null) { // x
    x += vals[0]
    linex = x
  } else if (vals[2] !== null) { // x + w
    x += vals[2]
    linex = x + w
  } else if (vals[4] !== null) { // x + w/2
    x += vals[4]
    linex = x + (w >> 1)
  }

  if (vals[1] !== null) { // y
    y += vals[1]
    liney = y
  } else if (vals[3] !== null) { // y + h
    y += vals[3]
    liney = y + h
  } else if (vals[5] !== null) { // y + h/2
    y += vals[5]
    liney = y + (h >> 1)
  }

  return {
    x, y, linex, liney
  }
}
復制代碼
撤銷和恢復
撤銷和恢復的功能是比較簡單的,其實就是用棧來保存每一次需要保存的配置結構,就是要考慮哪些操作是可以撤銷和恢復的,就是像節點移動,節點的新增和刪除,連接線的連接,連接線的備注新增和編輯等等,在相關的操作下面入棧即可。
// 撤銷和恢復操作
const cacheComponentList = ref<WF.ComponentType[][]>([])
const currentComponentIndex = ref(-1)
// 撤銷
const undo = () => {
  componentRenderList.value = JSON.parse(JSON.stringify(cacheComponentList.value[--currentComponentIndex.value]))
  // 更新視圖
  updateCanvas(true)
  cancelSelected()
}
// 恢復
const redo = () => {
  componentRenderList.value = JSON.parse(JSON.stringify(cacheComponentList.value[++currentComponentIndex.value]))
  // 更新視圖
  updateCanvas(true)
  cancelSelected()
}
// 緩存入棧
const chacheStack = () => {
  if (cacheComponentList.value.length - 1 > currentComponentIndex.value) {
    cacheComponentList.value.length = currentComponentIndex.value + 1
  }
  cacheComponentList.value.push(JSON.parse(JSON.stringify(componentRenderList.value)))
  currentComponentIndex.value++
}
復制代碼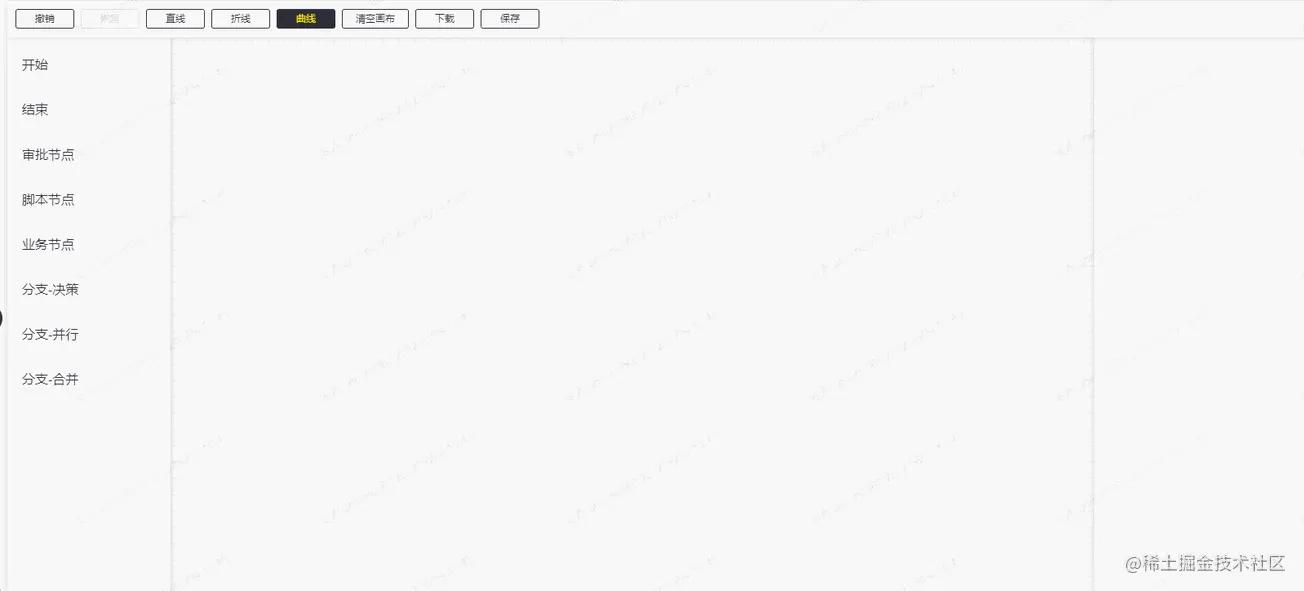
最后
這里主要的已經差不多都寫了,其實最紅還有一個挺有用的功能還沒有做。就是改變已經繪制的連接線的起止點。
這里的思路是:先選中需要改變起止點的連接線,然后把鼠標移動到起止點的位置,將它從已經繪制的狀態改為正在繪制的狀態,然后再選擇它的開始位置或者結束位置。這個后面看情況吧,有空就加上。


